|
| A sneak peek of some of my recent work! |
Across campus, it's the week of mid-terms. Usually this is a stressful time for many students as they are trying to cram in last minute study sessions before an exam. I, however, have been able to be back at my apartment by 7:15pm this evening after some leisurely hunting in the grocery store for great deals and clutching my Big Y gold coin like it was actual precious metal (I found an incredible deal on pistachios with a gold coin!). I was able to do this and make food for the next day because I'm a ceramics major. Compared to other art majors, ceramics requires weeks and weeks of preparation and planning to have work completely finished by a deadline. Because of this planning, I have everything thing done in advanced before it's due. This is compared to a drawing or painting that I could work on until the last five minutes before a critique. I was even fortunate enough to think that my critique for advanced ceramics was two days earlier than it actually is! After class today I went to the gym today, took a run around campus, shaved my legs, and enjoyed some hot cock-a-leekie soup that I made with my love this past weekend. I feel so liberated and relatively stress-free...for now.
Going back to what I said earlier, some of you may not think that that getting back to my apartment at 7:15pm isn't something to celebrate, especially since I typically arrive at school between 8:00-8:30am every morning. However, for over the past few weeks, I have been INCREDIBLY busy. I can't recall a more stressful time in my life so far. The past two weeks especially, I've been pulling many late nights, sometimes not getting home until midnight, the latest being 3:30am. I would then sleep a maximum of 7 hours, one time 5 hours two nights in a row. It was not healthy. I was able to actually watch my immune system break down in front of my eyes one evening and I threw in the white flag that night and slept for 11 hours straight. I was only at my apartment to sleep, shower, and eat breakfast. The entire rest of the day was spent at my studio.
You may be asking yourself why? Although I may be free right now, ironically, during the week of mid-terms, the process of making ceramic work is demanding. I believe I've talked previously about what I do in the studio but in short, I have to make, test, and fire everything I create.
I think in pictures I can explain this the best.
 |
| In process shot of making a plaster mold. I already cast the first side and I'm preparing to cast the other. |
I'm taking a mold making class and we had to make four molds of cups: one that we make out of clay, an object that we found, a natural wood/vegetable object, and a machined wood prototype. For each mold, I must solve the problem of how best to cast the object. Each one is different. Some have undercuts that I have to consider or a lot of texture that could be problematic when casting. The maximum amount of pieces to a mold I have is four but someone in my class has a seven piece mold. For each piece, you have to block of sections with clay, make key holes, brush on a mold-release soap on the surface of the object and on the plaster so it doesn't stick, clamp the piece in place with wood boards (you see me using them below), line the edges with clay so it doesn't leak, mix up a small batch of plaster, and finally pour it and pray that it doesn't leak or cause any problems when you go to open it later.
 |
| I use boards to prevent the plaster from pouring out everywhere. You can see that I just poured this plaster. |
I had a few technical difficulties with a couple of my pieces but nothing TOO terrible. I can't really complain. I was able to make molds of all of my cups, even if I don't like one it's at least done. My professor also asked that we make casting slip and make four casts of each cup, totally 16 cups. I lost a lot of pieces because I tried to take the mold apart before the casting slip was dry enough and I ended up splitting the piece inside.
To make a cast, you hold your plaster mold together with either a large rubber band or belt and pour in casting slip (basically watery clay with some sodium silicate in the recipe so that it's plastic with less water). The plaster will absorb the water from the casting slip and will start to create a wall. You can see this wall by either blowing on the edge revealing the thickness of the wall or by gently shaking it. Since the plaster is absorbing all of this water, the level of the casting slip drops and I refill it up the top constantly throughout this casting process. When I deem the thickness of the cast is appropriate, I pour out the liquid slip back into my bucket of casting slip which I later re-mix and use again. Just waiting for the slip to be thick enough can take between 35 minutes to well over an hour depending on the mold and slip I'm using. After the extra slip is poured out, I then wait again until the slip is dry and stable enough for me to release it from the plaster mold by taking it apart. Every mold is different. Some I can release within an hour and others I have to wait at least 2 or 3 hours.
 |
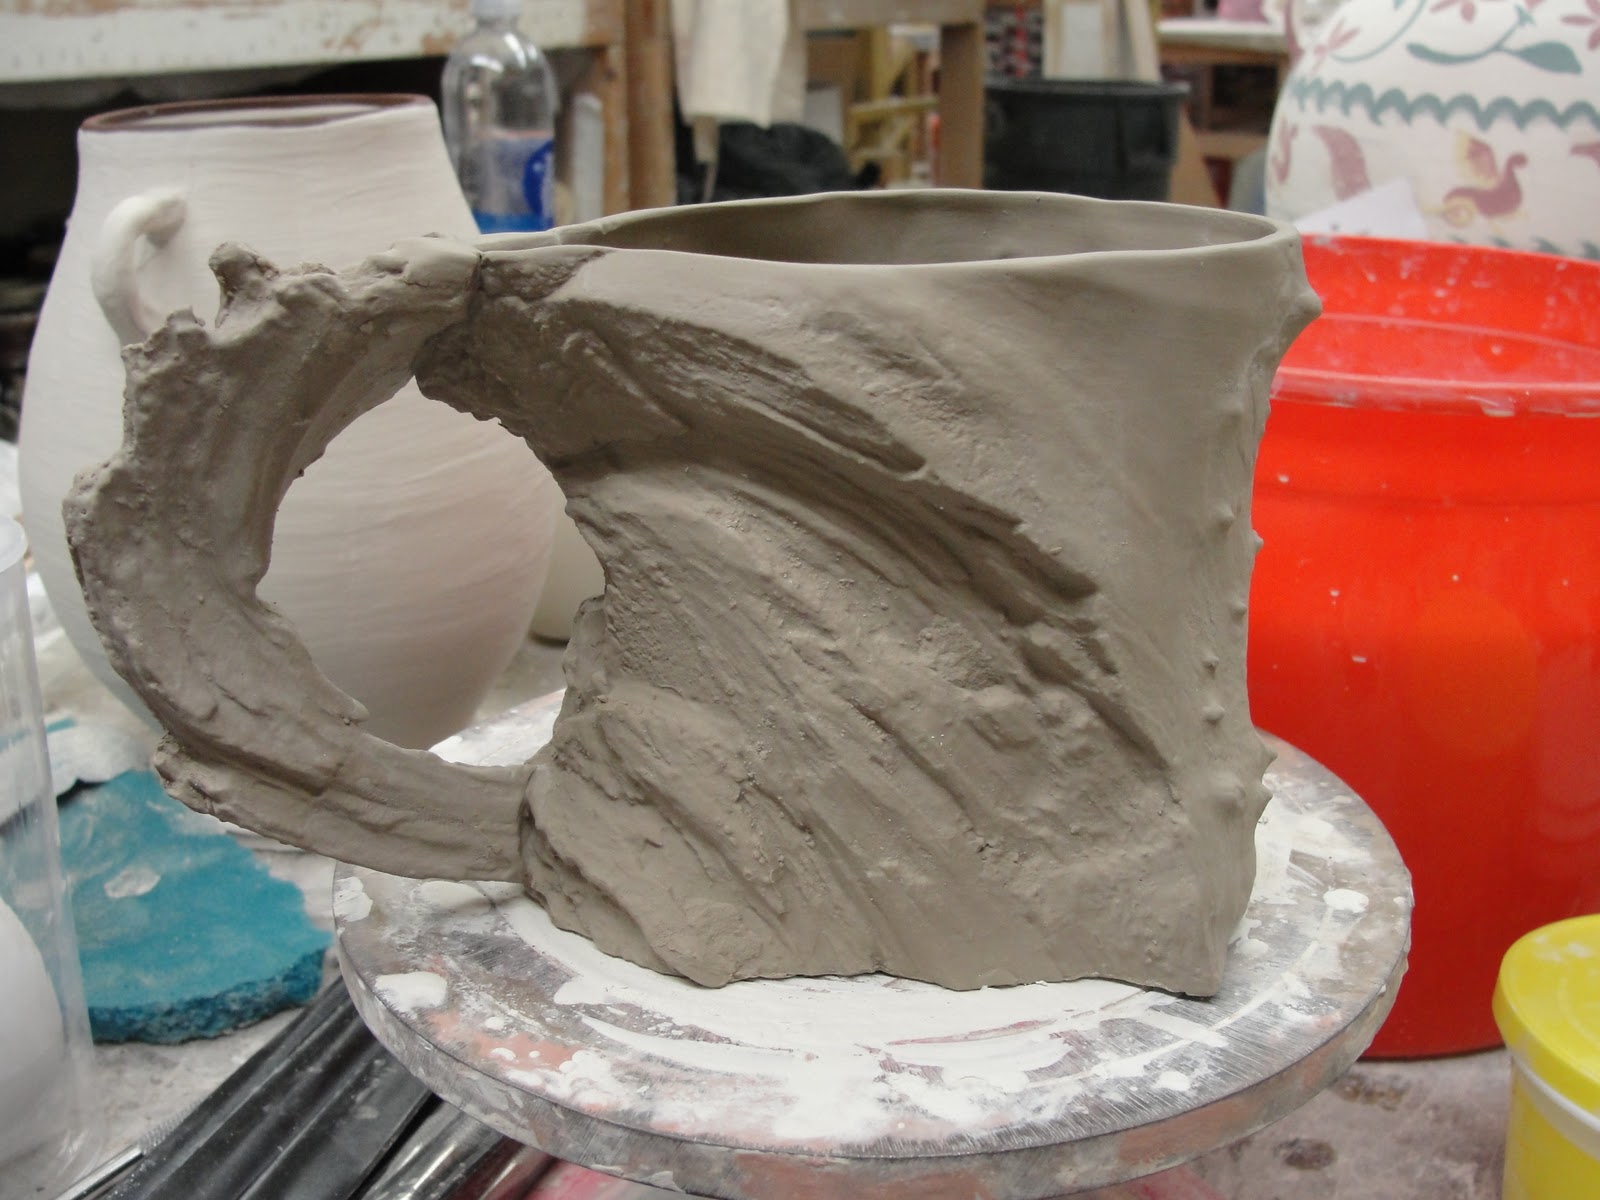
| Part of a tree section I cut and a perfect wood piece that acts as the handle that I found outside the ceramics building. |
This is one of the pieces I've cast. I stumbled across this interesting chunk of wood outside and almost stepped on this absolutely perfect curved piece that is the handle to this mug. I had to make plaster molds of the cup and handle separately and then I attach the two pieces together when they come out of their molds. This is by far my favorite mold and it's surprisingly one of the easiest molds I have when it comes to releasing the cast from the mold.
 |
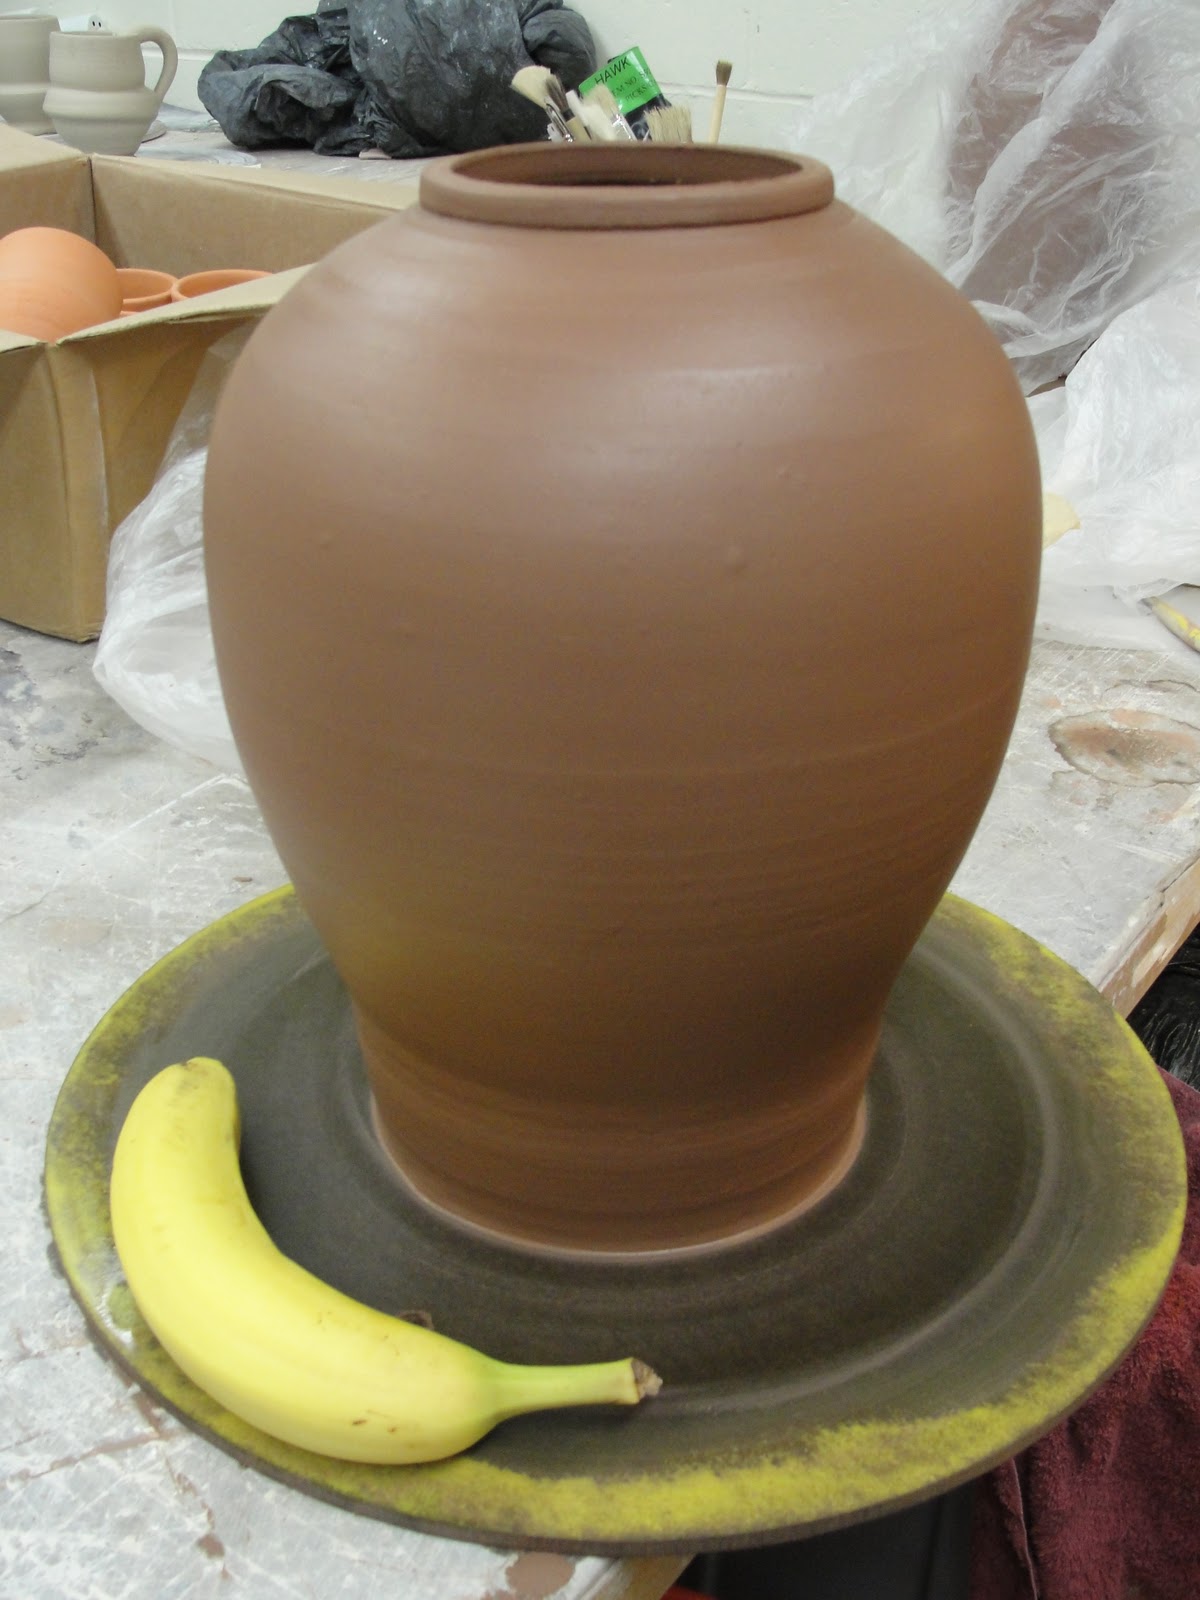
| The banana is for size comparison. |
I've also been concentrating on low-fire terra cotta work. I'm working on a small series of work where my forms are jars and my surface treatment is majolica. The photo above is the largest surviving piece I've thrown. You will see it completely finished further below.
This is what has been keeping me up late at night. This terra cotta pictured above has a large percentage of sand in the recipe. I did not think of how the sand would feel on my hands when I was making the clay. After hours of throwing, the sand would make my hands raw. After days and days of throwing with the clay, I could feel it removing layers of skin from my hands and it became incredibly painful to throw. I absolutely had to stop working with this clay for the time being since I had much more to throw and I created a new terra cotta recipe of my own design.
 |
| A small bowl made in the clay I designed. |
If you compare the picture of this bowl above with the jar, you will see that there is a color difference. I chose to make a darker terra cotta clay with no sand. It's beautiful to throw with and the color is fantastic when I put majolica on it, which is a very thick and opaque white.
However, this bliss was about to end. That huge jar a couple pictures up was thrown with 17 pounds of clay. My teacher Matt Towers LOVED it and demanded more. He wanted five large jars from me fully glazed and lustered by mid-term (this Thursday). So I agreed and began to throw more large jars.
I hit a string of bad luck. I made 200 pounds of this new clay I designed very wet in hopes that it would become plastic more quickly. I was throwing between 13 and 17 pounds of clay. It was an entire body workout. I would throw a cylinder close to 22 inches tall, have my arm past my elbow in a piece...and I would lose it. There would be a slight wobble in the clay, an air bubble perhaps, which just increased in intensity the further I pushed the clay. My work would collapse right in my hands. In agony I would tear the clay off my pottery wheel, slam it on the plaster table next to me, weigh out another 15 pounds of clay and begin again. This happened to me three times in a row. Mind you it took me half an hour just to center each piece of clay before I even began to throw.
A few large pieces did make it though. But I'm hit again. While trimming one piece, I go right through the bottom. Another one mysteriously forms long horizontal cracks along the belly and falls apart. Another one just recently formed severe cracks and broke while during the majolica glaze firing.
I then gave up entirely on the big jars and made tiny jars just so that I would have work to show for the mid-term critique of all of the senior major's work. I was feeling so frustrated that I was spending days and nights in the studio with hardly anything to show for it.
My glaze is also not satisfactory for me. My majolica is pin holing and you can see it in some of the photos. Although I don't think it detracts from the subject of each piece, it is a technical difficulty that I have to work out right now. I'll be testing new batches of glaze in the coming week.
Surprisingly I do have some work! I'm simply exhausted from all of this typing and I really just want to get some sleep. Here are a ton of photos for you to enjoy!
 |
| "Resentment" Terra cotta, majolica, luster. Small jar. |
 |
| "Crazy Hair Day" terra cotta, majolica, luster. Small jar. |
|
 |
| The back of each of the two small jars. |
 |
| "Fall from Before" terra cotta, majolica, luster. Large jar (you saw this one above!) |
|
 |
| "The Coming Departure" terra cotta, majolica, luster |
 |
| "The Coming Departure" (reverse side) |
|
|
 |
| Detail shot of "The Coming Departure" |
 |
| "Flowers of Cortona" wood-fired porcelain with black slip. |